Approach
I utilized a Z-Uno project module (https://z-uno.z-wave.me) for the Z-Wave controller. According to Novo tech docs, they have a contract wired interface (RJ12), which makes everything really simple: the Z-Uno will supply Z-Wave interface and will control a curtain motor though dry contacts.
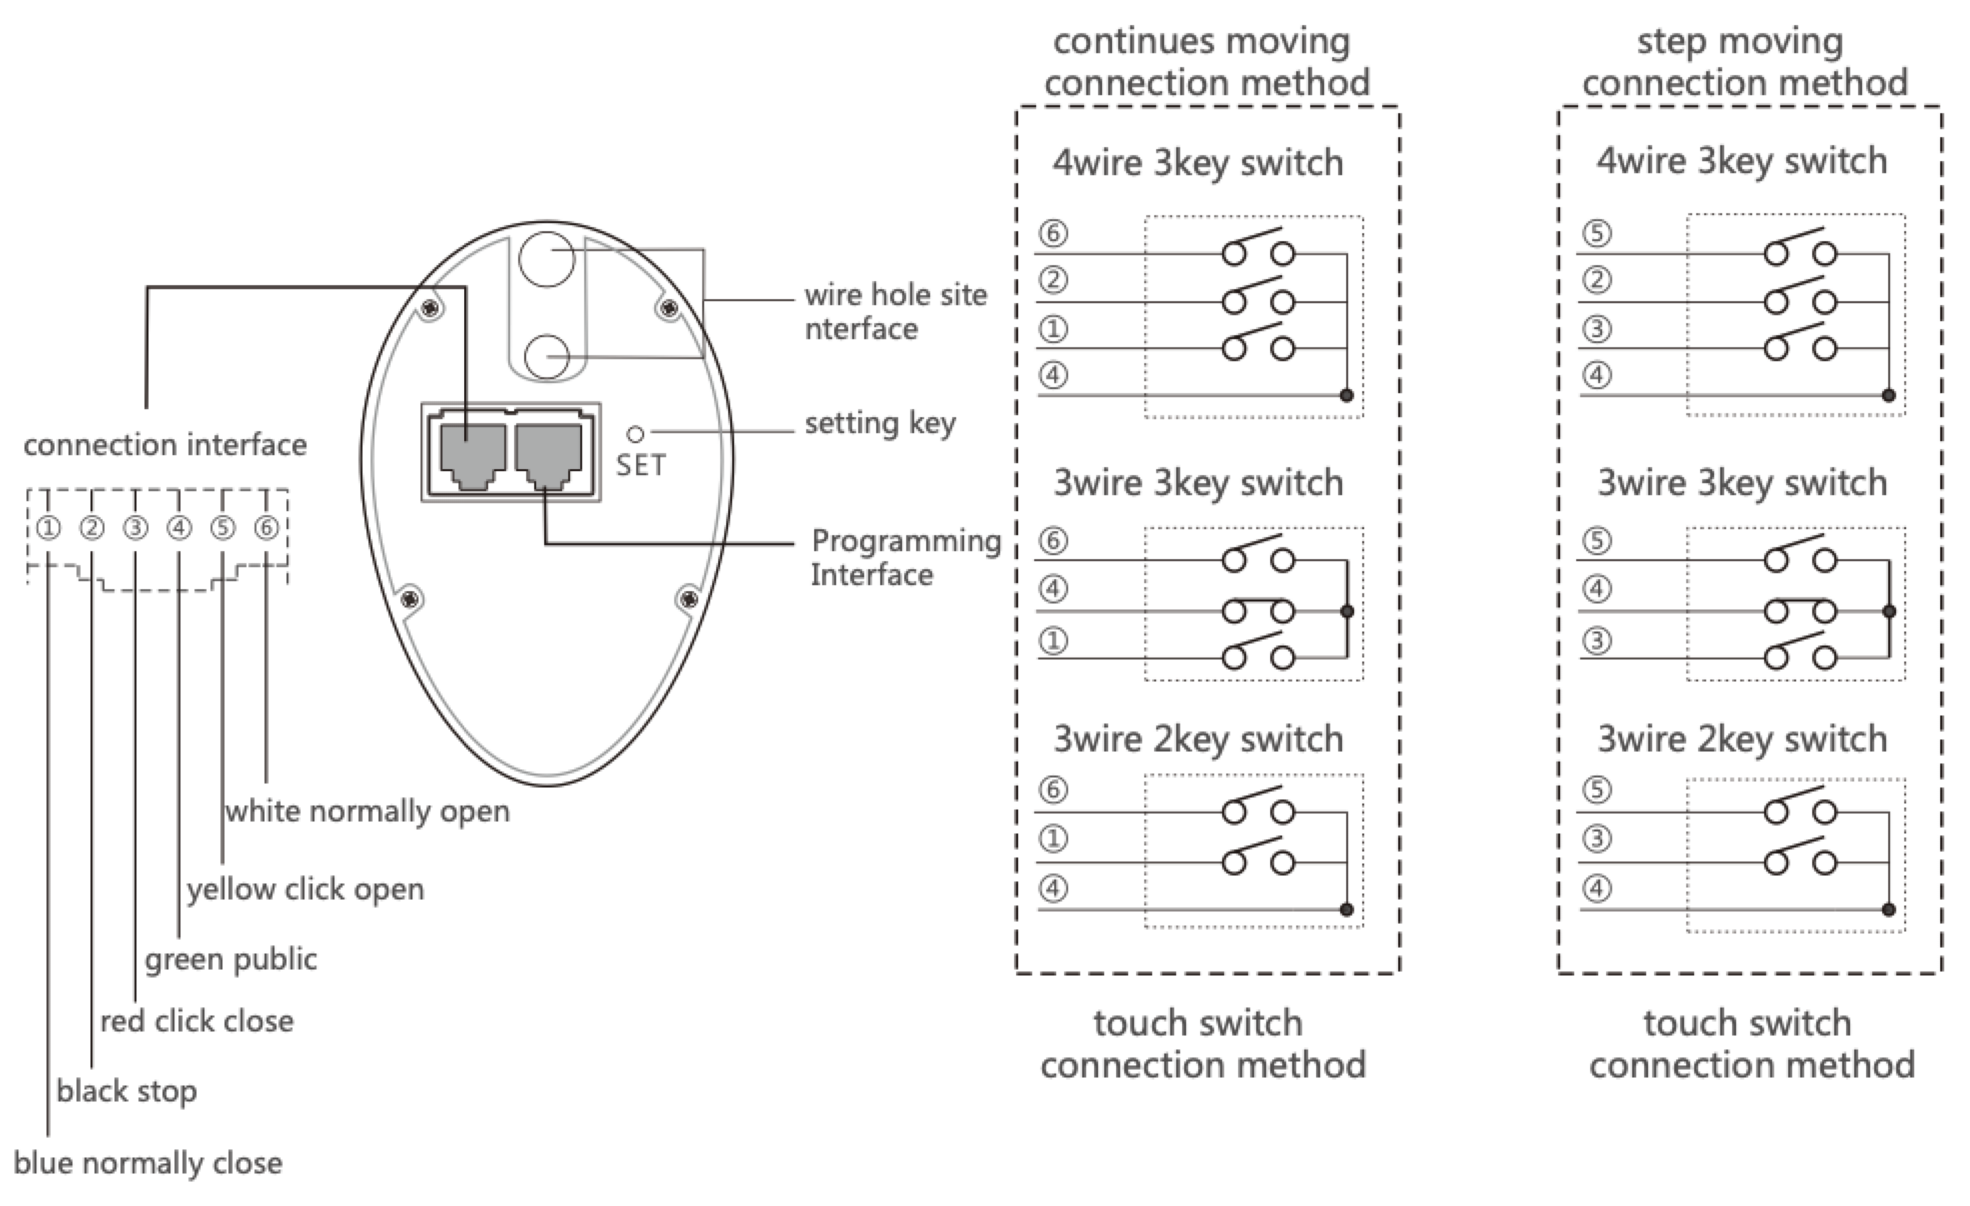
An extract from NOVO curtain motor datasheet with connection interface
Hardware design
The 5v power comes from DC barrel jack (5×2.1mm). Then to control the wires I only needed 4 transistors with 4 base resistors, and an RJ12 socket.

This is the default position of a figcaption, but it can be centered or at the end.
Parts list below:
| Part |
|---|
| 1x Z-Uno v1 or v2 (https://z-uno.z-wave.me) |
| 5x 1 kOm axial resistor |
| 5x NPN TO-92 transistor |
| 1x RJ12 through-hole socket |
| 1x 0.1u capacitor (optional) |
| 1x DC 5×2.1mm barrel socket with through-hole mount |
| 1x 5v 5×2.1mm DC power supply |
The PCB is one-sided and very basic because I made with my tiny home CNC. I only used through-hole contacts since they are simpler for me to solder (YMMW).
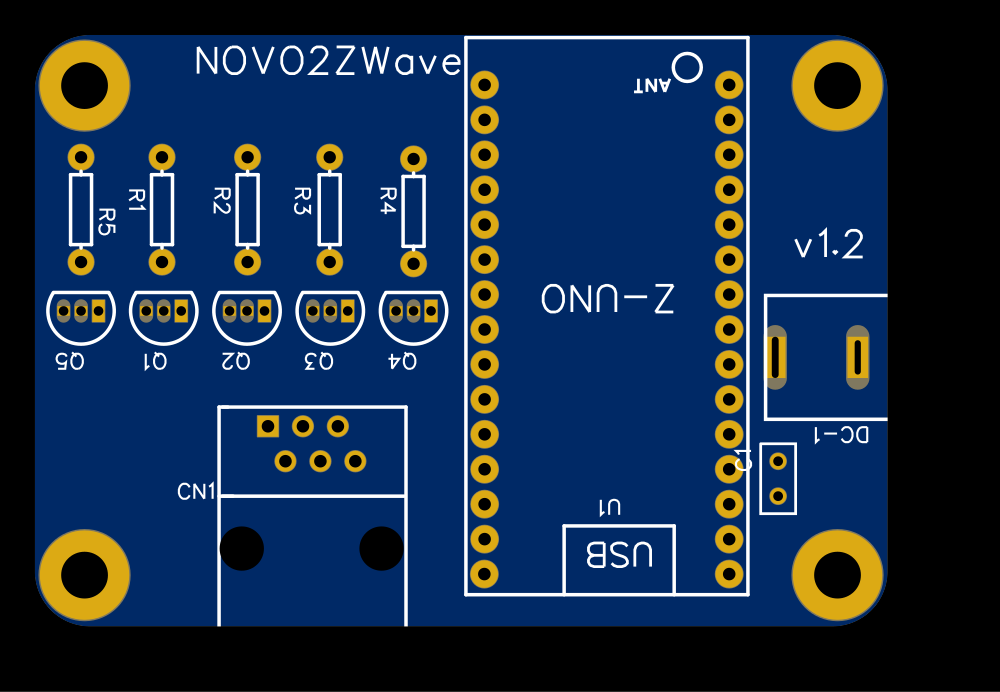
Top side (component)
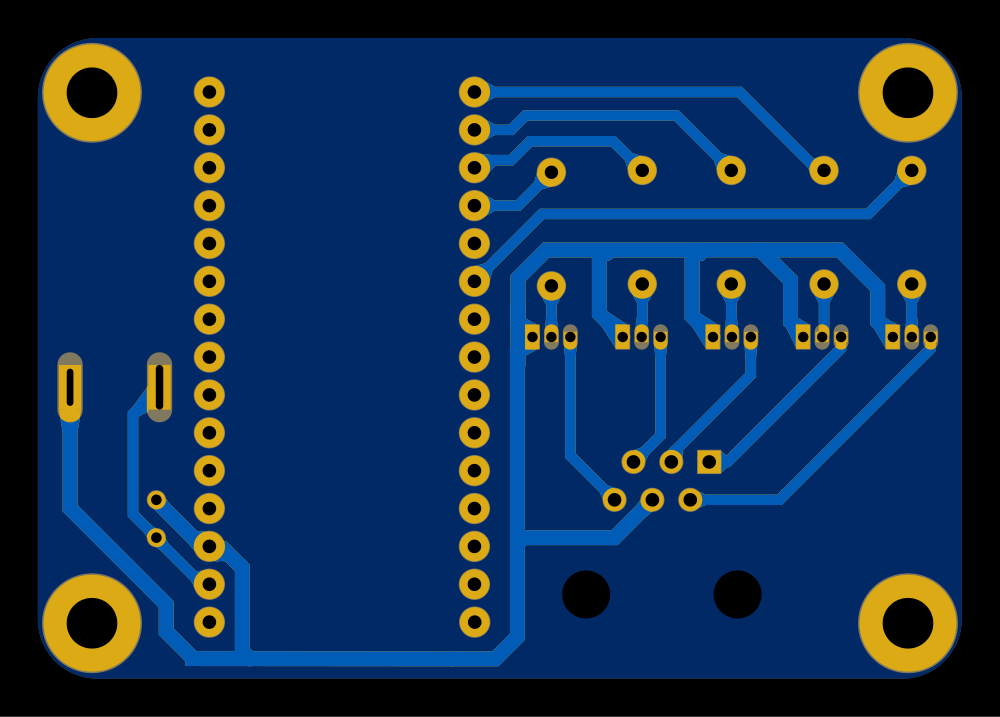
Bottom side (solder)
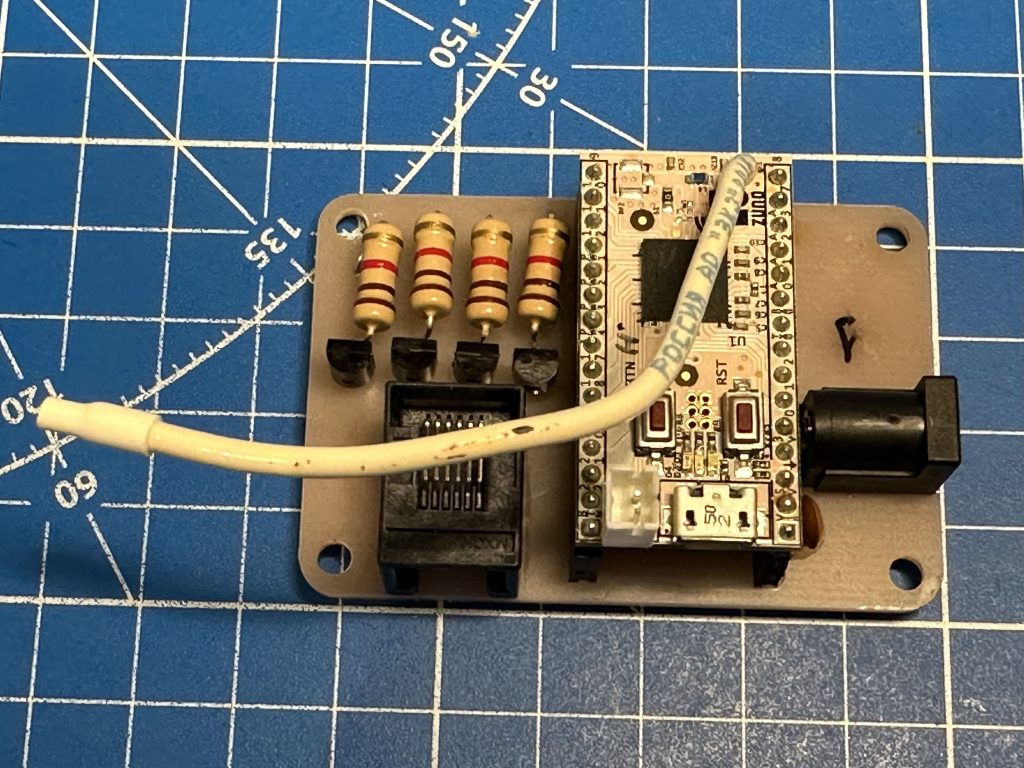
An early working 4-channel PCB prototype
Controller firmware
I used first generation Z-Uno that are typically programmed with Arduino IDE.
The code is here: https://github.com/avignatenko/novo2zwave.
It maps curtain controls into five buttons, each button to a motor action: continuous open/close, stepped open-close, and stop. The only tricky part is releasing virtual switches. NOVO expects signals to come from real momentary switches, and stay pressed for certain time, like 0.5-1sec in order to trigger the action. That was simulated in the code, only requiring z-wave controller to send one ‘switch on’ signal.
That’s it.
Lessons learned
- No need for a separate DC jack – easier to reuse micro-usb plug
- Use MOSFETs
References
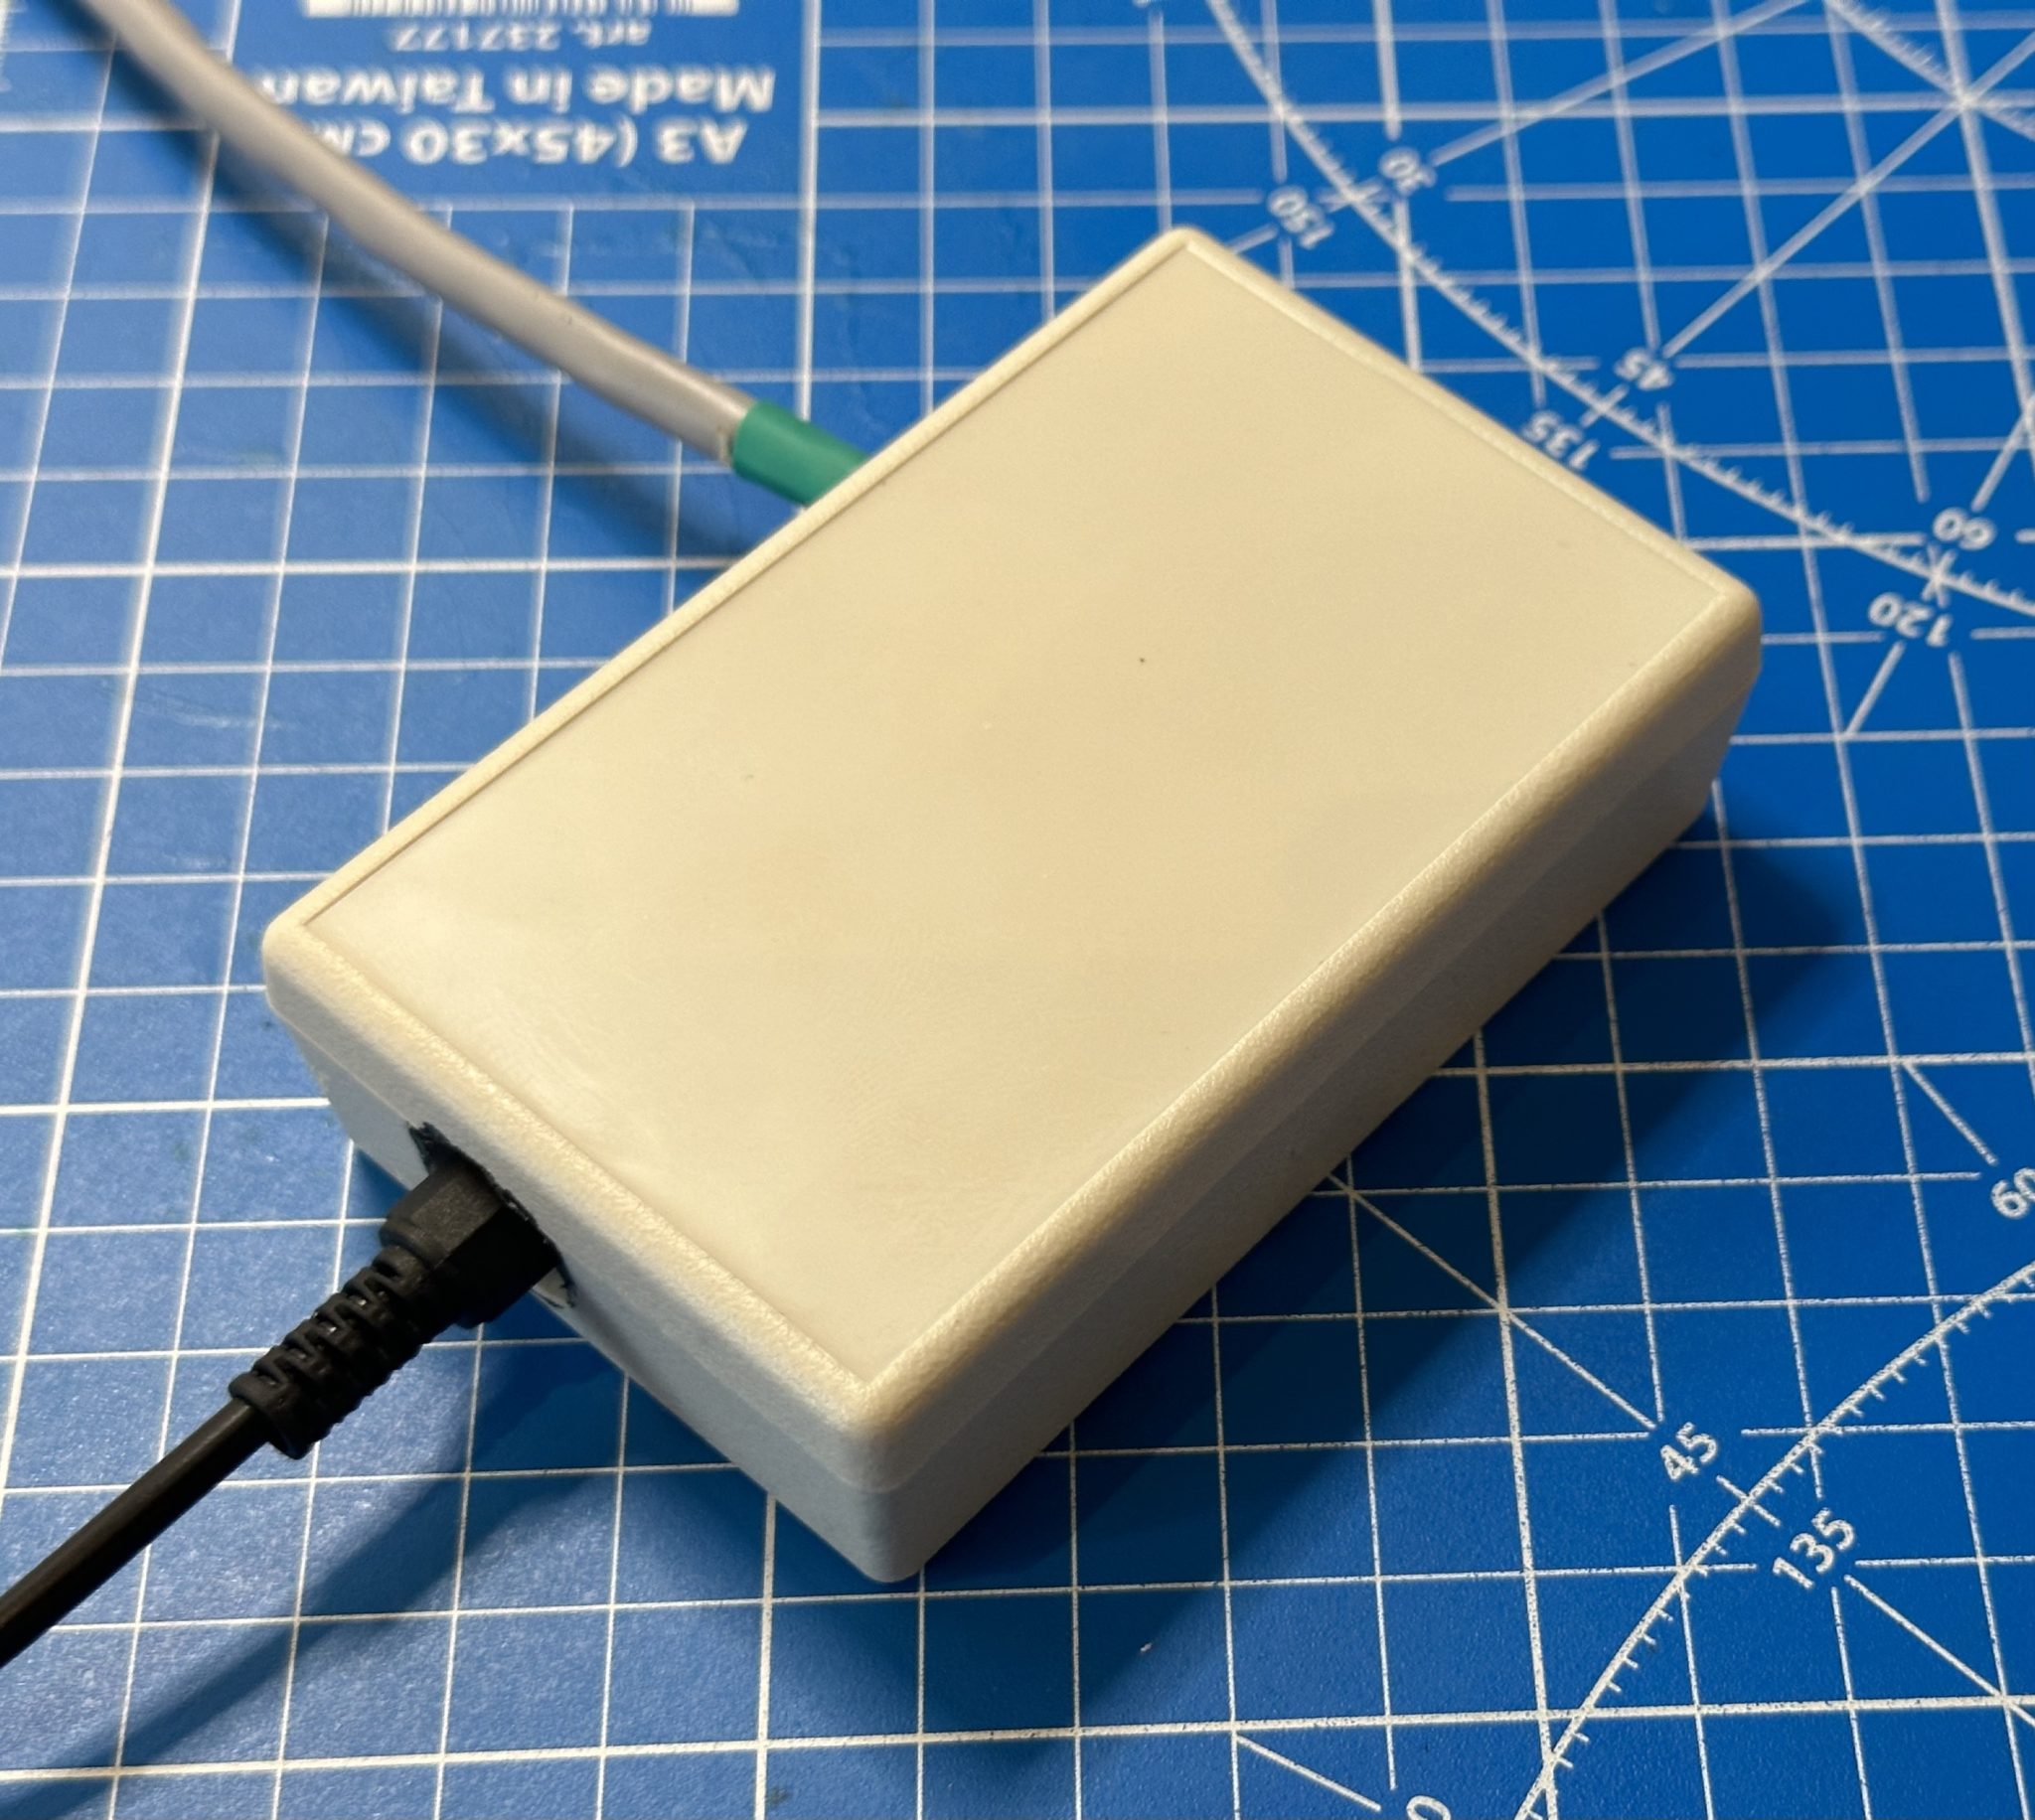
“Boxed” version of the controller
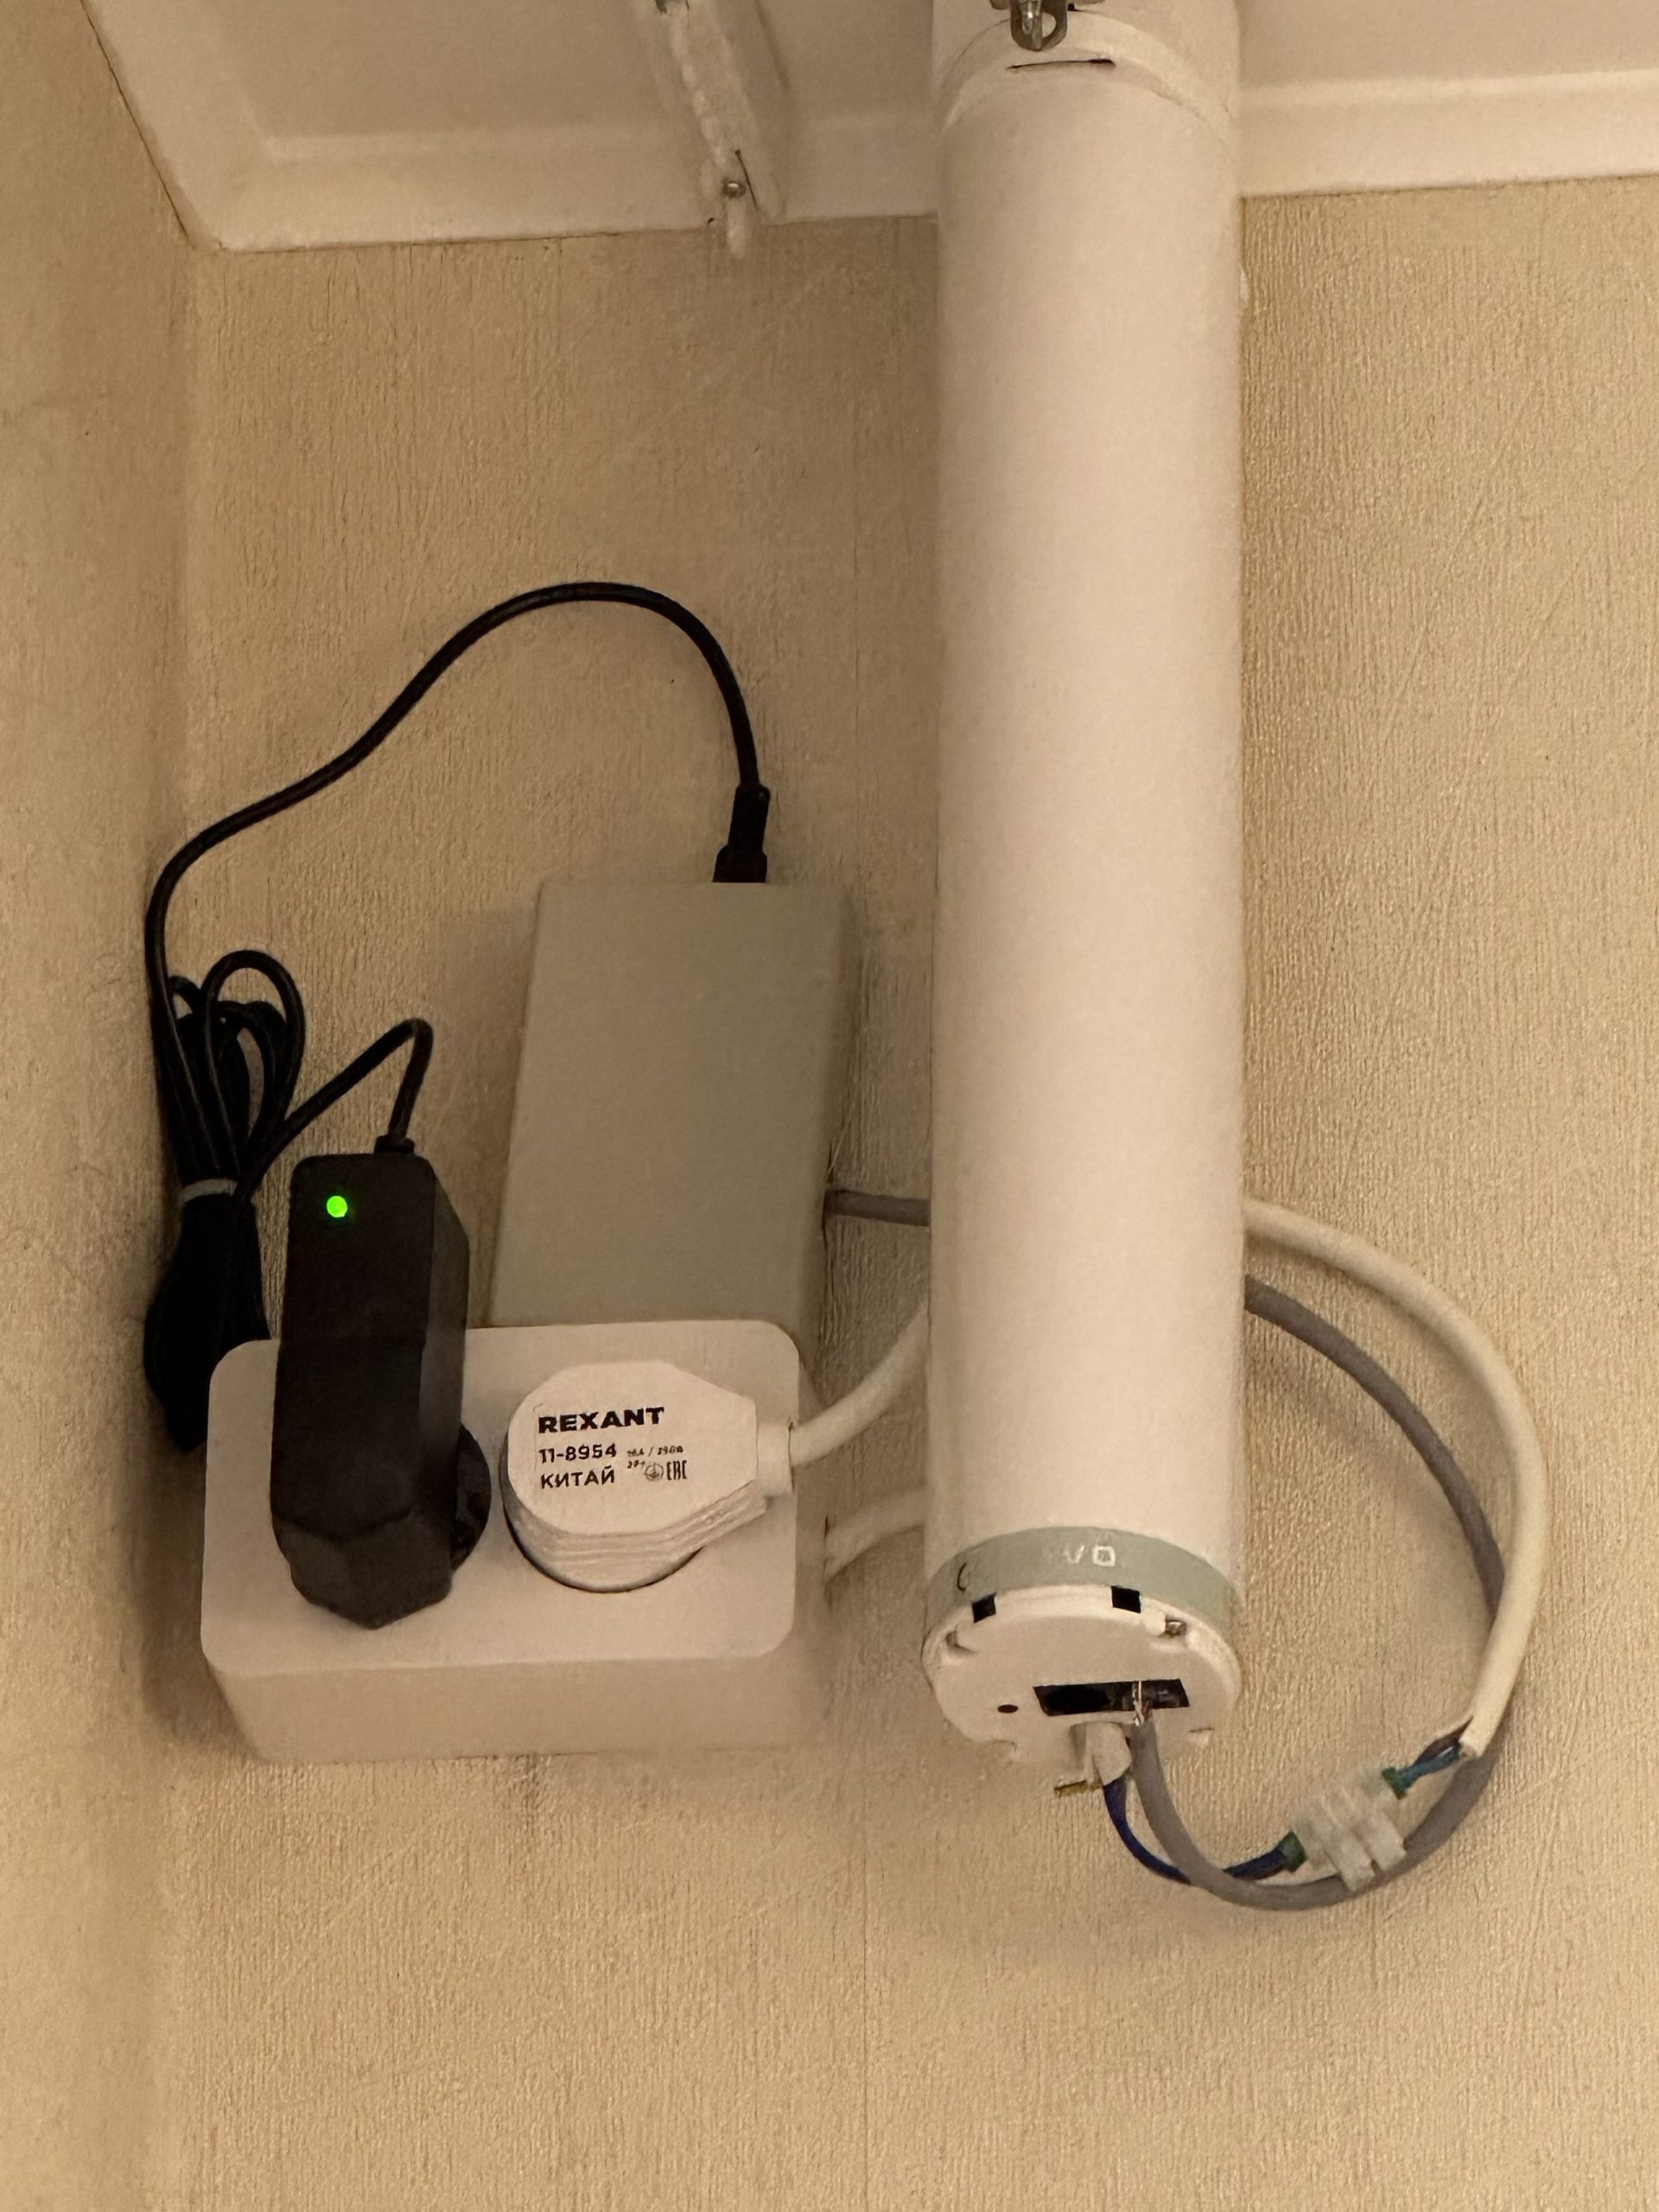
Installation (terminal cover removed from the motor)